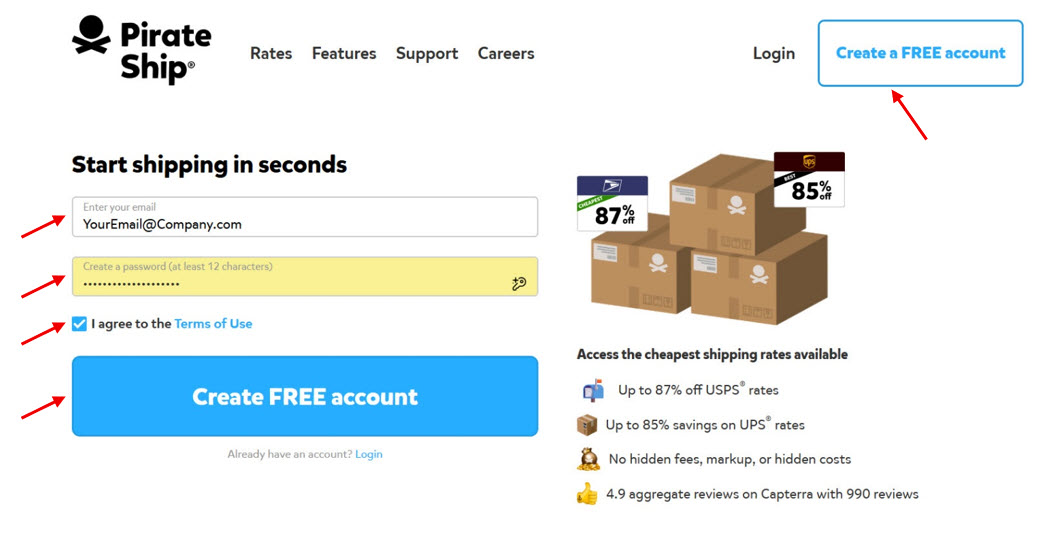
Using Pirate Ship – UPSBy Bryan Chin Create Label – Step 1Start by going to www.pirateship.com and click on “Create a FREE account”. Fill in your email and password.
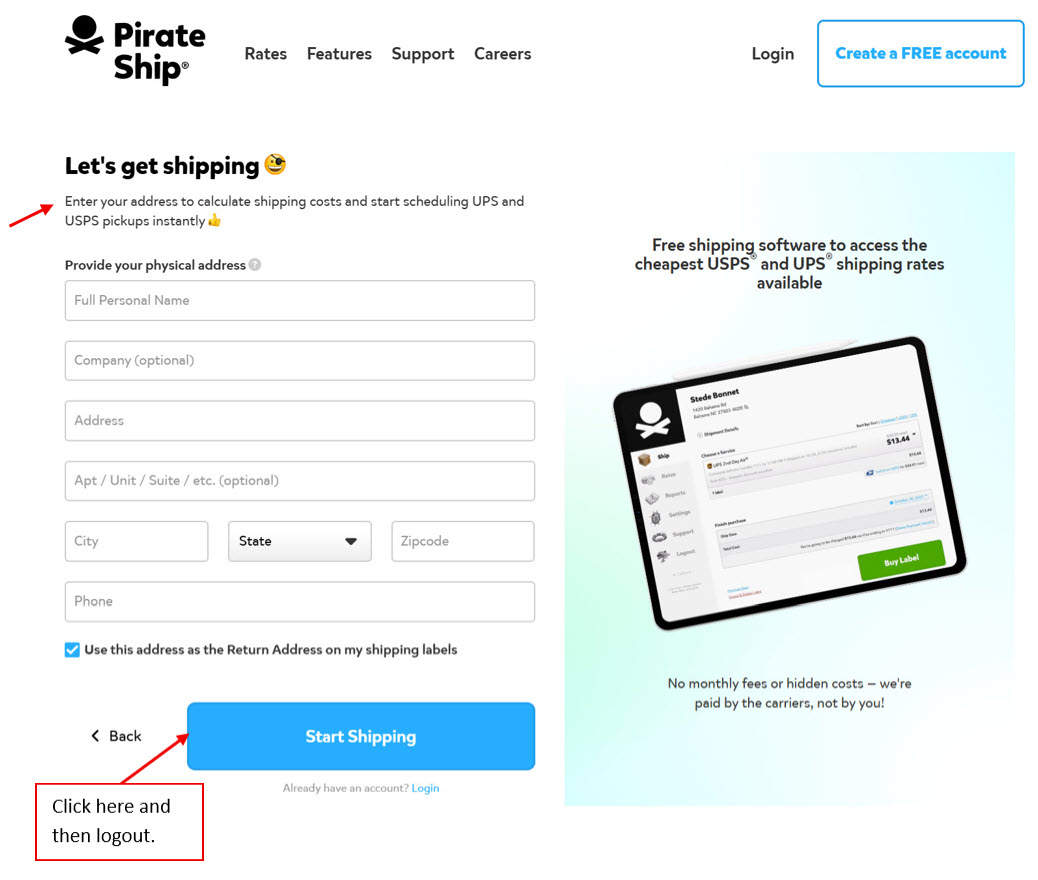
Create Label – Step 2Enter your information and click on “Start Shipping”. This will be used as the default for your address. Don’t worry you can always cancel the label later. I would just log out and login and then start from there.
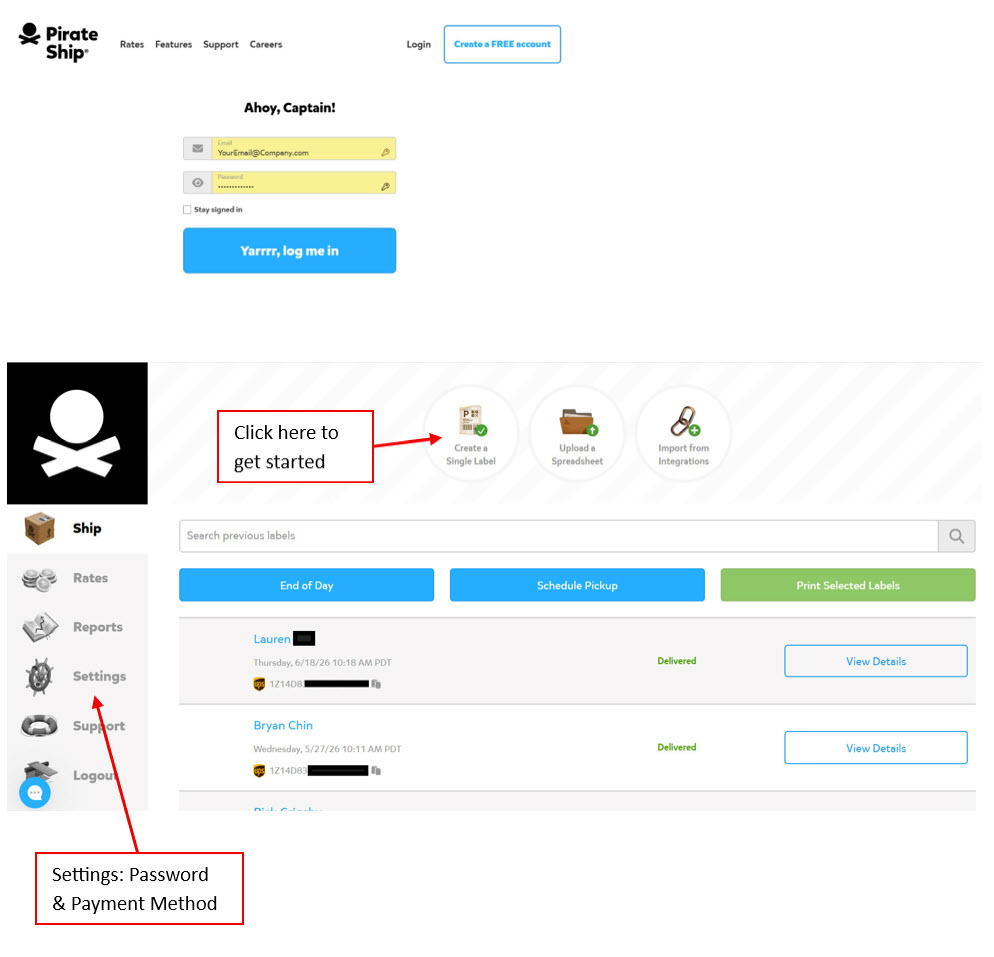
Create Label – Step 3Log back in to check that your password works, then click on “Create a Single Label” to get create a label. You can indicate how you would like to do payments before starting to create a label by using the Settings link on the left column. Otherwise it will prompt you to indicate payment method when you buy your first label. I use PayPal.
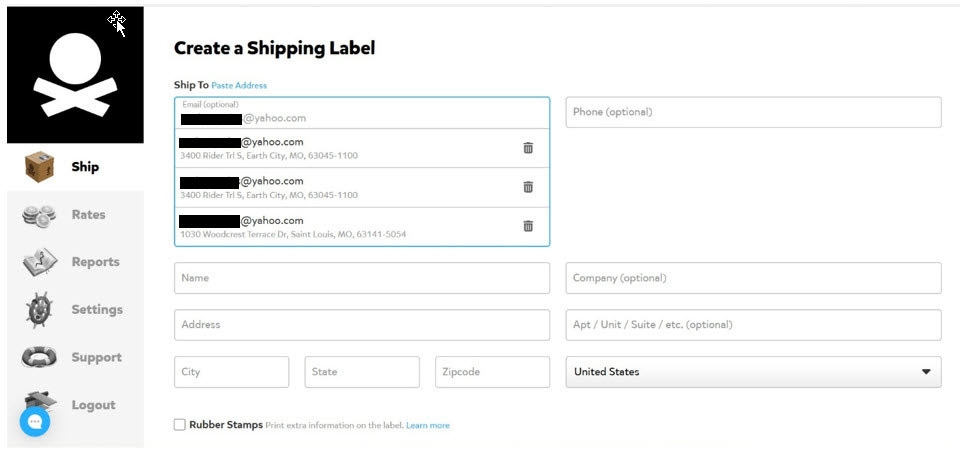
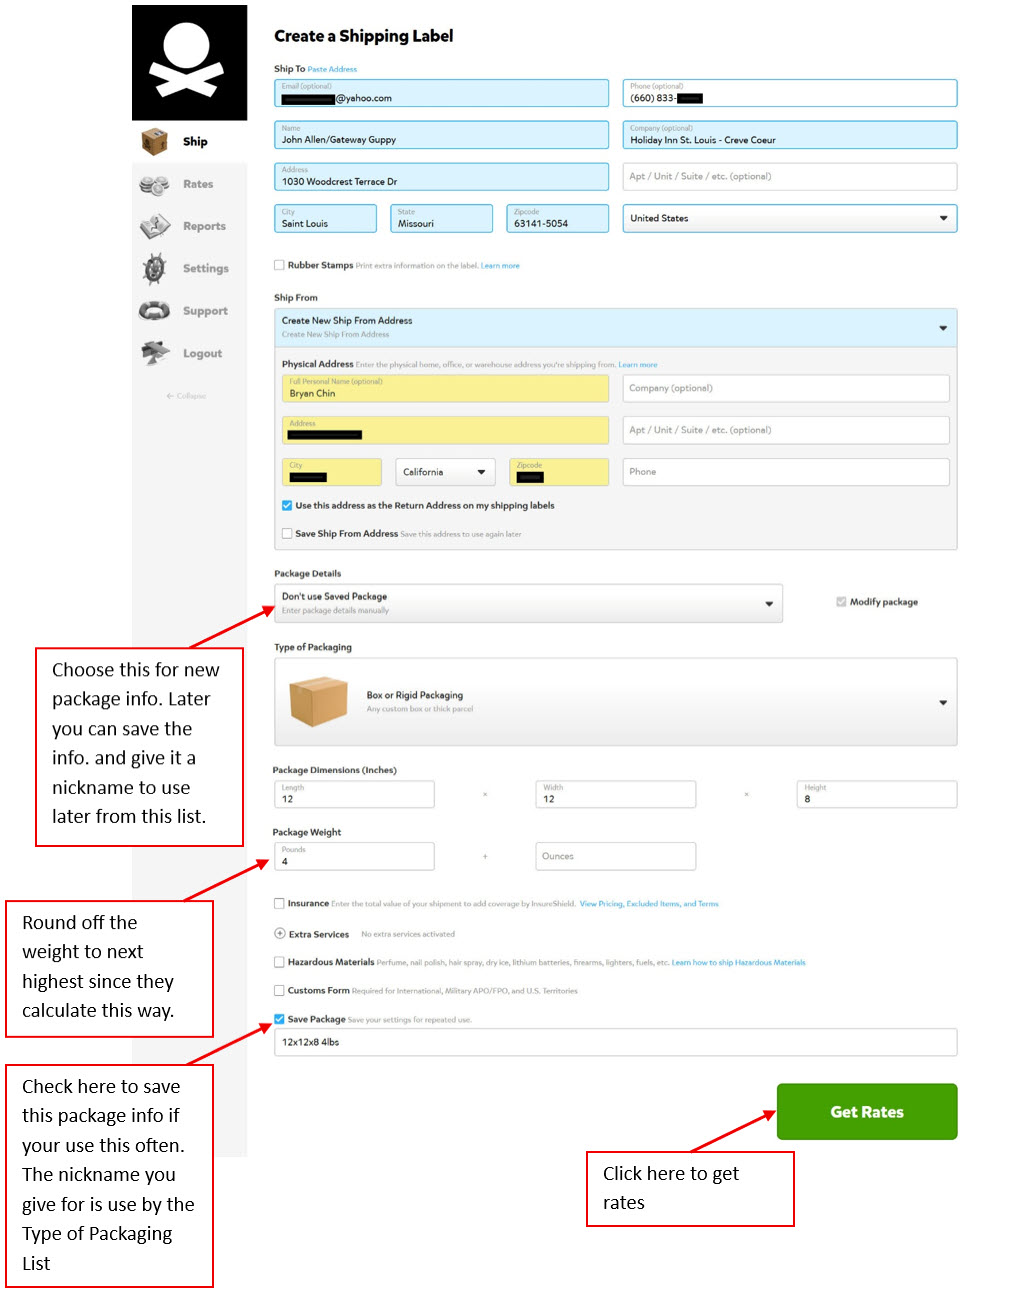
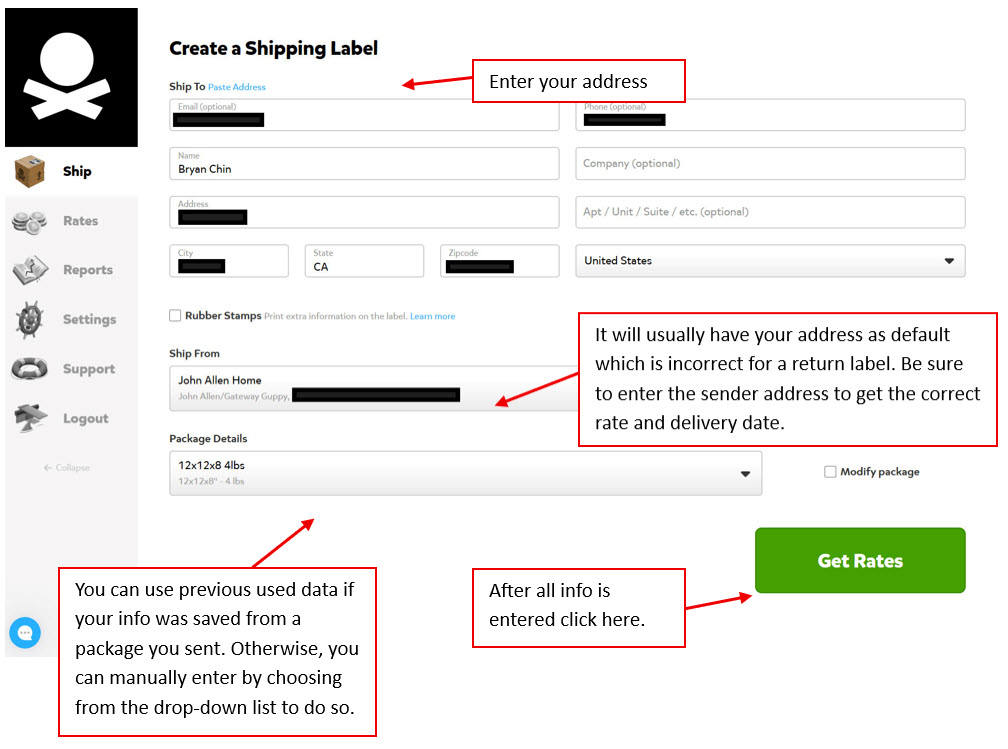
Create Label – Step 4As you type in the email address of the person you are sending to, the addresses associated with it will appear if you have sent to that person before. If it is a new person, you can manually enter the information.
Create Label – Step 5Enter the information below.
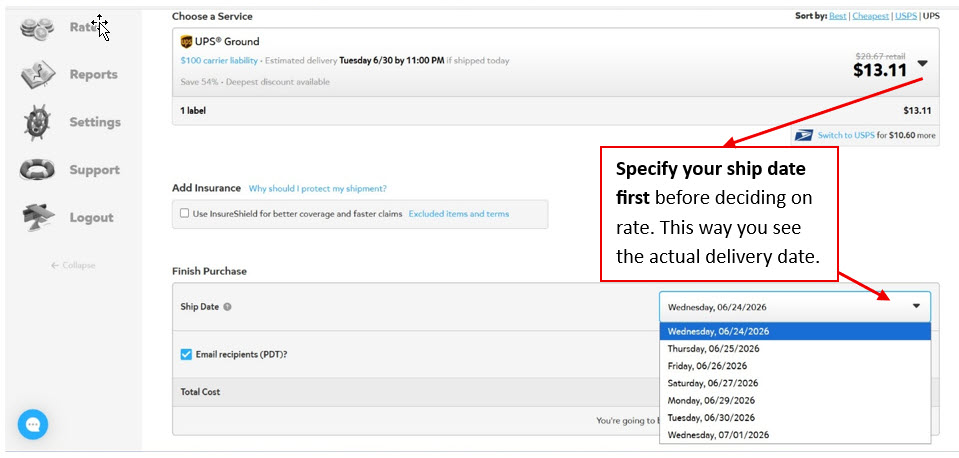
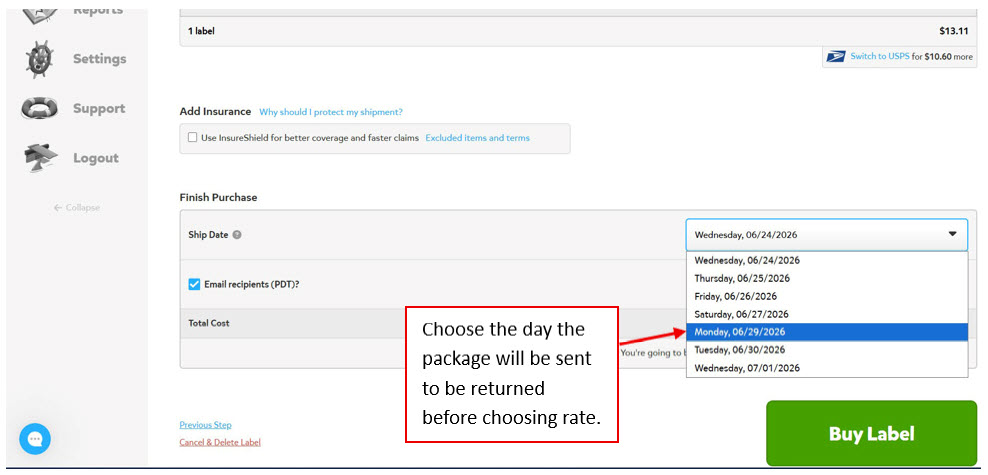
Create Label – Step 6Specify your ship date before deciding on type of service and rate. This will give you the delivery date based on when you drop off the package at UPS store.
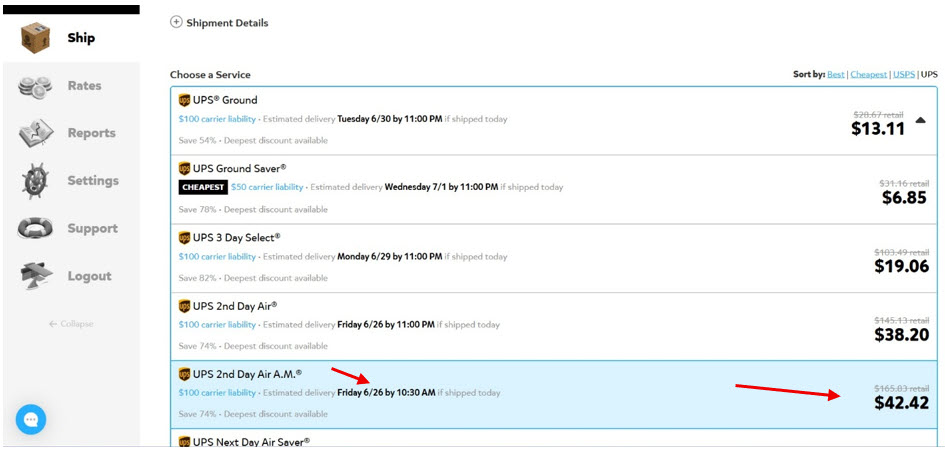
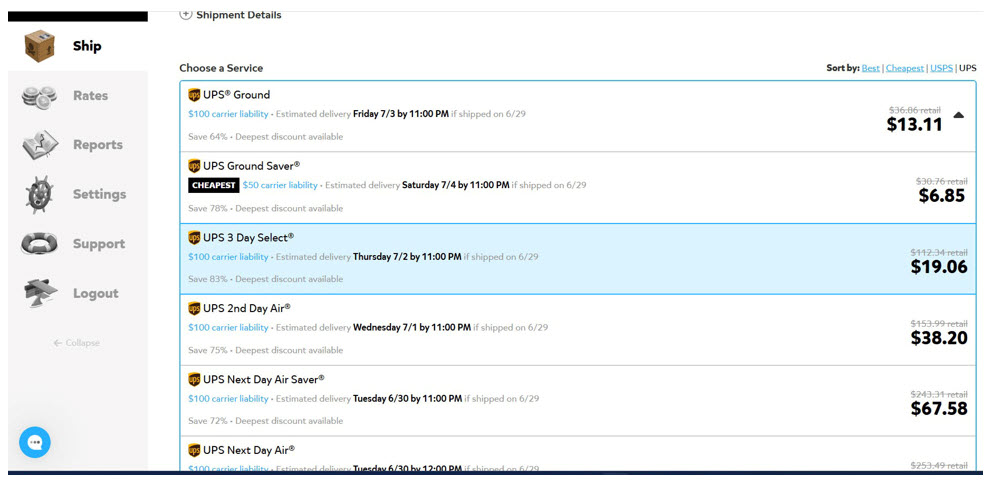
Create Label – Step 7Choose the delivery service/date/time/price to meet your needs.
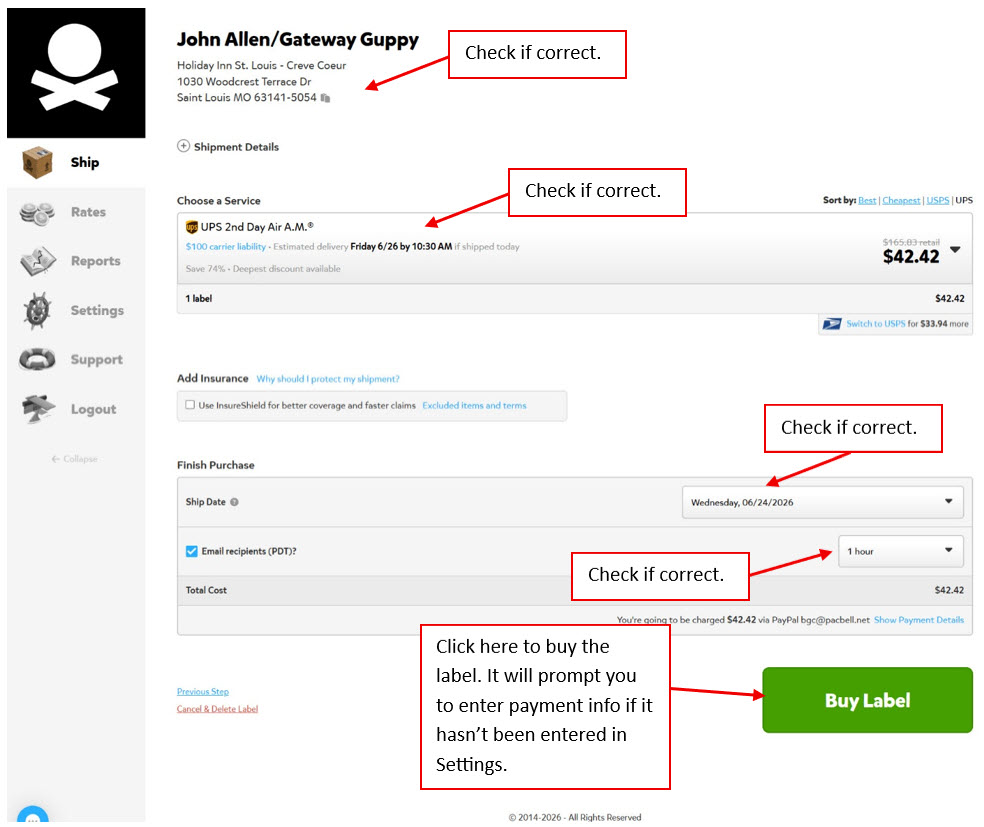
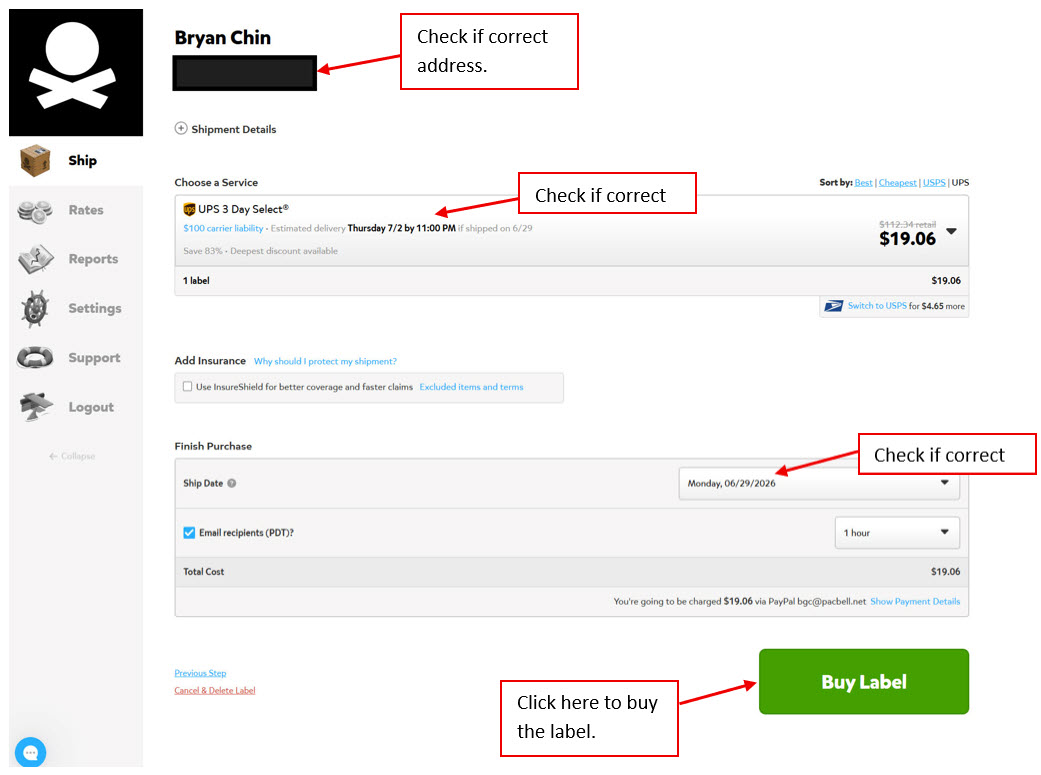
Create Label – Step 8Check all information and if correct click on “Buy Label”. If you want to restart, click on the “Cancel & Delete Label” link on the bottom left of the page.
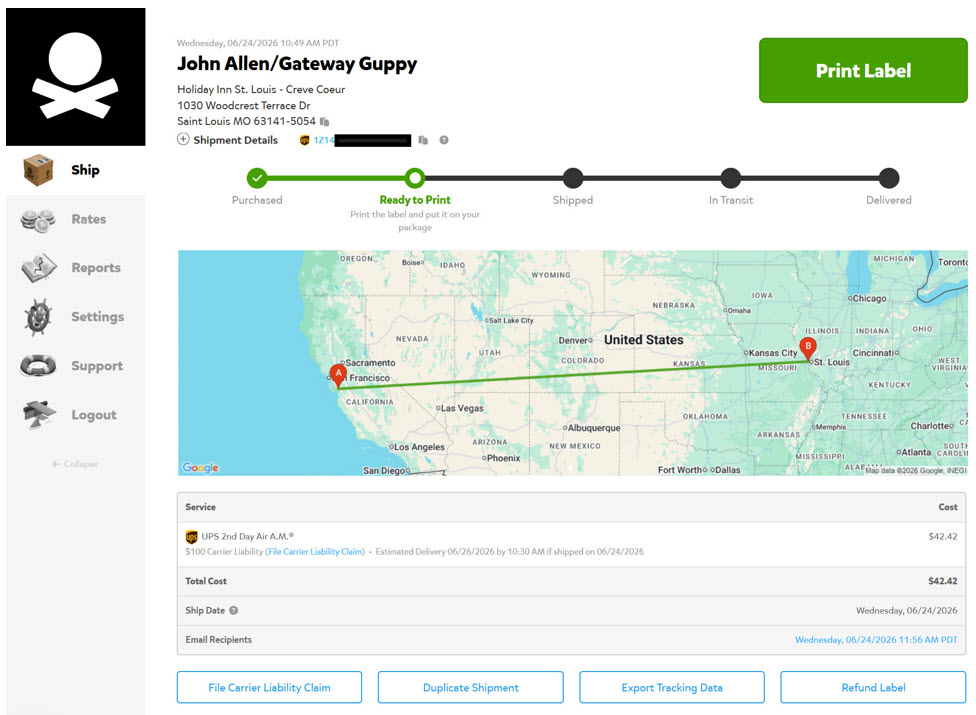
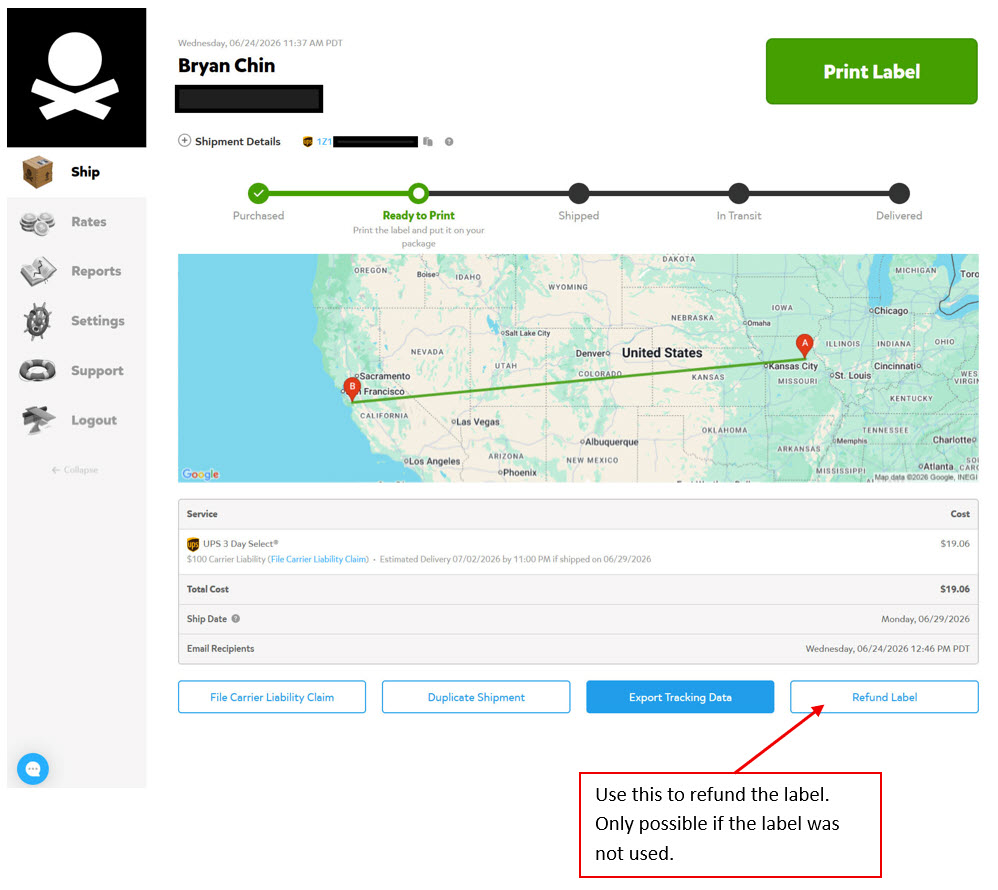
Create Label – Step 9Check all information for correct information. If you want to cancel before printing you can click on “Refund Label” below. If all information is good, click on “Print Label” to proceed.
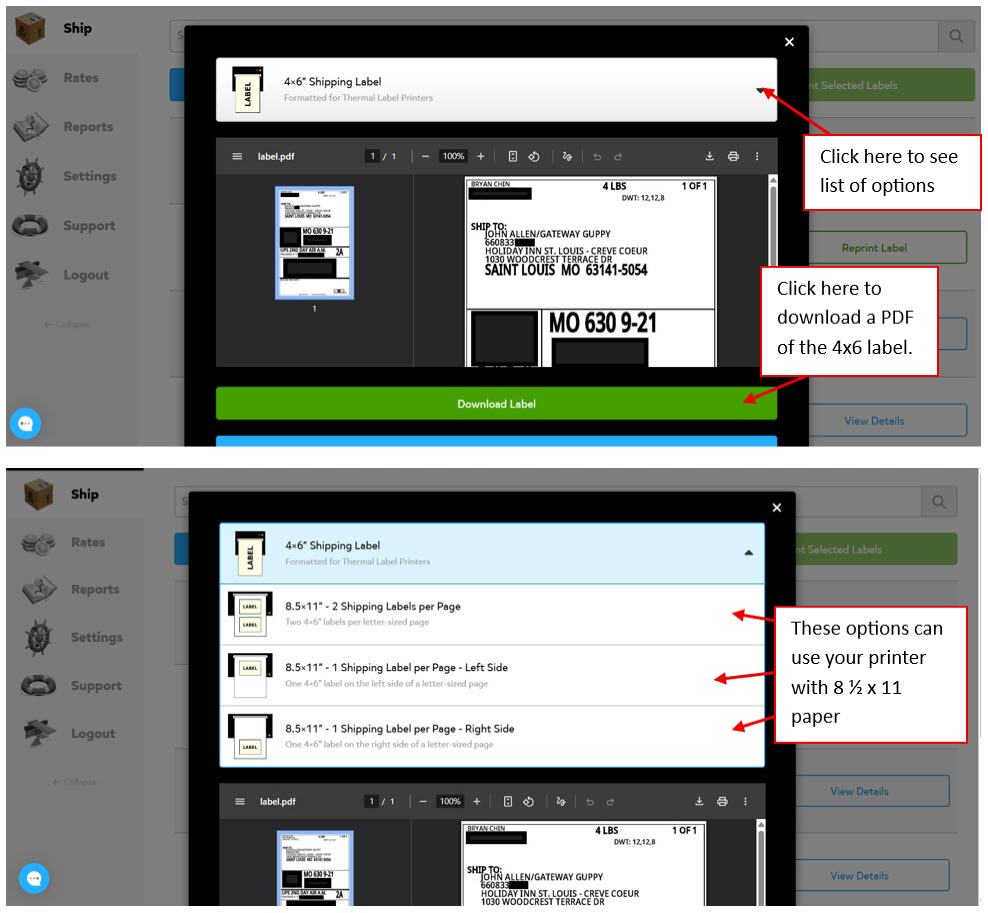
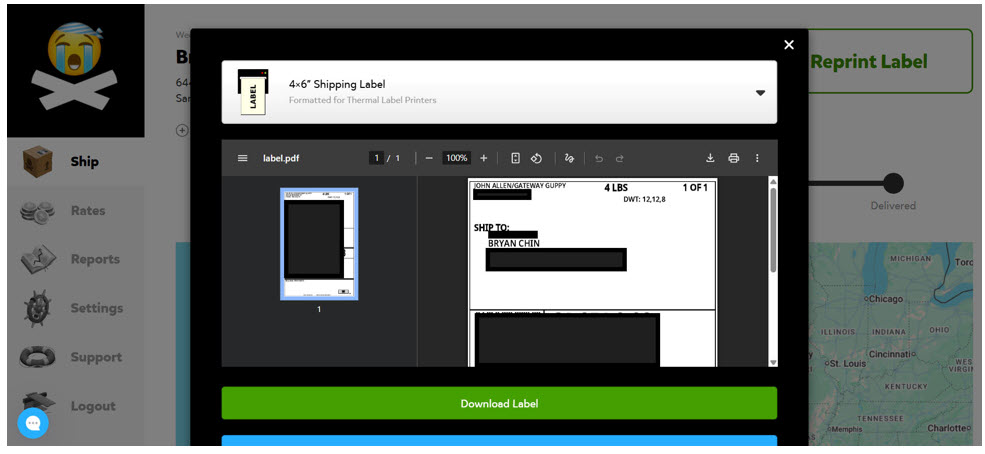
Create Label – Step 10Once the label has been purchased it will initially give you the option for printing on a thermal printer for labels. Click on the list to give you other options. You can print on plain letter paper and use packing tape to attach on the package. I found that I could download the PDF and use that with my printer using 4x6 single labels bought online. Saving the PDF is also a good way to save for your records.
Create Return Label
Create Return Label – Step 1Creating a return label is the same process as creating regular label. You will be able to use previous information you entered to the person you sent a package to.
Create Return Label – Step 2Before choosing the rate, specify when the returned package will be sent. Usually from a weekend show the following Monday the package is returned. This way you will see the delivery date and time. You have a limit of 7 days out from the label creation date to set a send date.
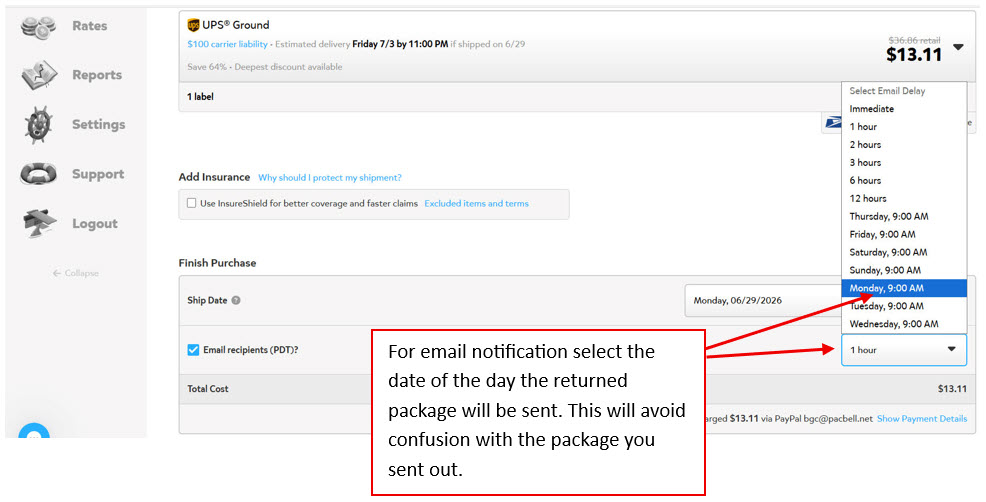
Create Return Label – Step 3Choose the notification email date to the same as when the returned package will be sent to avoid confusion.
Create Return Label – Step 4Choose your service/date/time/price. I usually choose a slower delivery to save cost.
Create Return Label – Step 5If every is correct click on “Buy Label”.
Create Return Label – Step 6Check all information, before printing the label. At this point you can refund the label if incorrect and restart. This is also useful if the package was never returned and the label was unused. The refund is a credit for the next label you buy on Pirate Ship.
Create Return Label – Step 7Print label as previously explained. If you did include a returned label in the package, you download a PDF file and send to person that will return the package. The person can print it and use that label on the package to be returned.
Please NoteApplications are constantly being revised. Be sure to review Pirate Ship’s instructions on how to use their application. There are also many features not mentioned in this article you can take advantage of.
|